Kawi2strokes.com Forum

Enthusiasts from around the world dedicated to the preservation and ritual flogging of the infamous Kawasaki 2-stroke Triples
It is currently Fri May 16, 2025 9:23 am

All times are UTC - 5 hours


Post new topic Reply to topic  [ 101 posts ]  Go to page Previous  1 ... 3, 4, 5, 6, 7, 8, 9 ... 11  Next
Author Message
PostPosted: Sun Jan 24, 2016 10:24 am 

Joined: Thu Jun 09, 2011 11:25 am
Posts: 3156
Yup, them little facia plate screws do not like to be torqued too tight. I.have seen more than a few facia plates loose on their screws, with no other problems with anything else on the gauges. Glad you got the seal issue resolved, That bike is going to end up an epic restoration.


Last edited by H2RTuner on Sun Jan 24, 2016 12:11 pm, edited 1 time in total.

Top
 Profile  
 
PostPosted: Sun Jan 24, 2016 10:30 am 

Joined: Wed Jun 22, 2011 7:46 pm
Posts: 1334
Location: Kingston, N.Y.
Nice build :thumbup: did not know Honda has a chain drive tranny .


your not the only one to have to split an engine twice, I did a Yamaha 1100 in the 80's split repaired reassembled and while putting the engine back in the frame I found a transmission bearing C inside , :banghead had to do it over again and for free too since I was on the clock the customer can not pay for my error.

_________________
1975 S3 project bike
1974 H1 project bike
1972 Yamaha R5
1974 Yamaha RD350


Top
 Profile  
 
PostPosted: Mon Jan 25, 2016 12:30 pm 

Joined: Wed Jun 22, 2011 11:43 am
Posts: 311
Location: CT and Sometimes SC
Got up yesterday morning and figured, what a great Winter day to assemble the motor. Got to this point and went to put the rings on the pistons.

Image

Everything was measuring out great, until the ring to side clearance. I could tell just handling them that something was wrong. The clearance is beyond spec limit and the rings are useless. A pic of the measurement of an old ring,

Image

And a new ring,

Image


Long story short;

From what I can figure Honda had a change in design after S# 2551567, this bike is before that, The piston appears to be from before that number, (which is correct) and the ring set, after. Got the whole set off Ebay, go figure, right? We'll see how this works out as the seller is across the pond. And I don't mean the UK Pond, The Big Pond. Don't know what my next move will be, that's what work is for, looking like I am busy as hell and checking on my bike parts.


Top
 Profile  
 
PostPosted: Mon Jan 25, 2016 12:35 pm 

Joined: Wed Jun 22, 2011 11:43 am
Posts: 311
Location: CT and Sometimes SC
So it was back to the chassis. I hate jumping around but got a few things mounted and tried to concentrate on rough in of the wiring. The harness is new reproduction and so are many of the small jumper connections. The signal light kit from 4 into one worked very well. The reproduction tail light, as they all seem to need, required some mods.

Image

Image

Image


It took a few KTM parts to get this reproduction tail light assembly to mount. I have never, any bike, God don't even get me started on the Norton, had a reproduction tail light that didn't need some time, thought, and a trip to the Hardware Store to mount properly. The Chinese are great believers in, "Close Enough, Good to Go" when it comes to reproduction tail lights.

Image


Top
 Profile  
 
PostPosted: Mon Feb 01, 2016 1:38 pm 

Joined: Wed Jun 22, 2011 11:43 am
Posts: 311
Location: CT and Sometimes SC
Well the motor is back together. I sure hope I got it right as it is a PITA to take in and out. Everything looks good, it turns over easily, all gears shift though easily. Even tested the new Neutral switch and that is working properly too. Hondamans book helped immensely through the rebuild. It is the little tips he has that make a difference. For instance, I didn't have Permatex #2 for the head discs, I went out and got it. Some pics of the motor done.

Image

Image

Image


Got the carbs backs from Nils and am very happy with the results. The carbs came back super clean and I like the finish. I like the Vapor Blasting look and could see how it could work very well especially for cases that don't get painted like Kawasaki Triples. Restocycle is another great resource for those of us who restore old stuff and I would highly recommend their services.

Image


Got the new face plates in, thank you Marcel, and installed them on the meters, and this time I took it easy on the screw torque.

Image


Top
 Profile  
 
PostPosted: Mon Feb 01, 2016 1:58 pm 
User avatar

Joined: Wed Jun 08, 2011 10:23 pm
Posts: 3852
Location: Colorado Springs, CO. USA
Love following this thread - keep them coming :thumbup:

_________________
This is true. Where I grew up the hills were so steep and long, when your ball rolled down the hill you just said "screw it"...


Top
 Profile  
 
PostPosted: Mon Feb 01, 2016 7:26 pm 
User avatar

Joined: Thu Jun 09, 2011 7:03 am
Posts: 4612
Location: Milang, South Australia
Yep, I'm really enjoying this build too, but it does make me glad I am working on a triple!! :lol:

_________________
"One day, your life will flash before your eyes. Make sure it's worth watching." : anon.


Top
 Profile  
 
PostPosted: Tue Feb 09, 2016 12:55 pm 

Joined: Wed Jun 22, 2011 11:43 am
Posts: 311
Location: CT and Sometimes SC
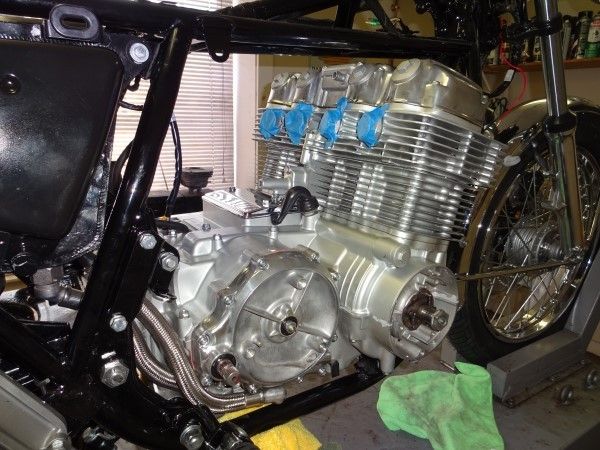
Wedding Day, the motor got married to the chassis. If you've never done a motor change out on one of these bikes, you haven't experienced what a "Tight Fit" is. I had some good, no, great material to go with that last sentence but, after all, this is a family friendly site.

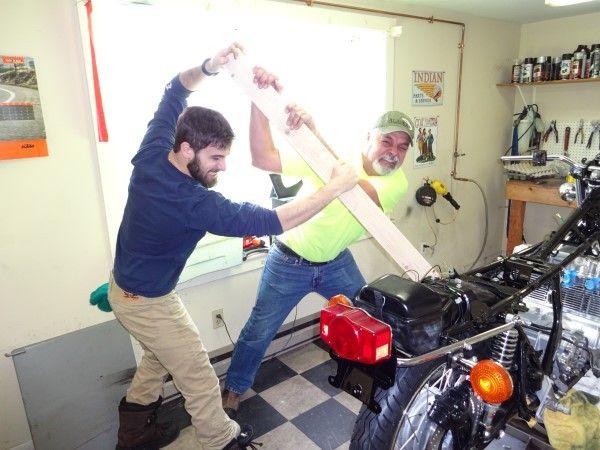
The idea was to get a couple of guys who will do just about anything for beer to do the monkey work.

I used SOHC Forum Member Dino, (Hack a Week) method of installing the motor. My configuration is slightly different from his but it is basically the same means to an end. An "H" Frame is constructed of 2X4s and strapped to the motor in both planes.

Image

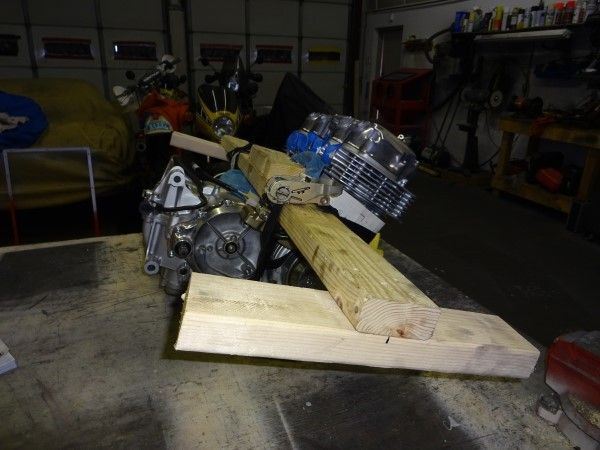
I also took Hondaman's advice from his book and ground off the few MM off the top of the lower right mount, yes, that's how tight this fit is. The grind got painted for corrosion only, you can't even tell it was ground off with the motor in the frame.

Image


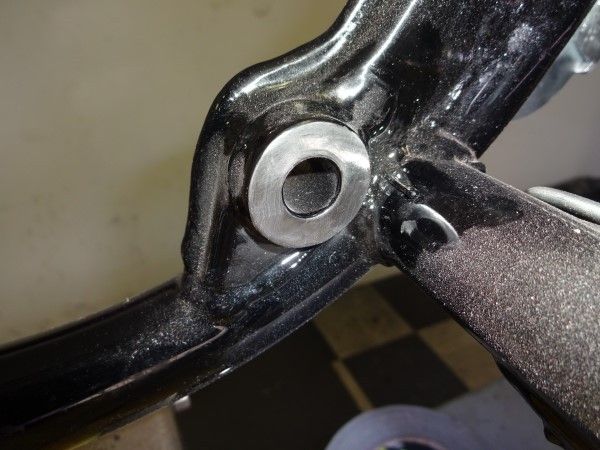
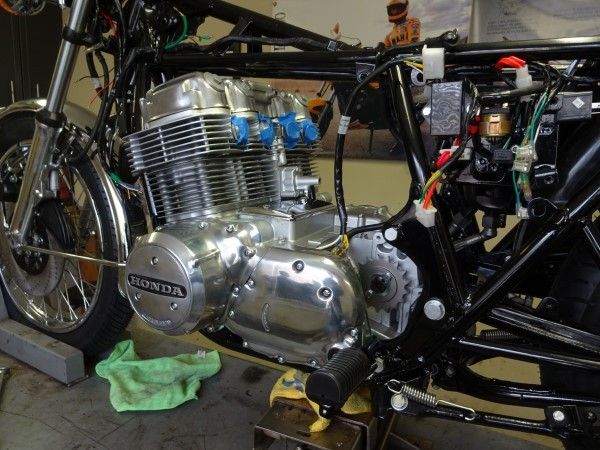
One thing I do is to sand off the PC on engine mounting surfaces on the frame that have to mount an engine between them. First, it gets rid of the thick powder coat, and second, there is a good ground now.


Image


My crew at work,

Image

Image


The motor in the frame,

Image


Image


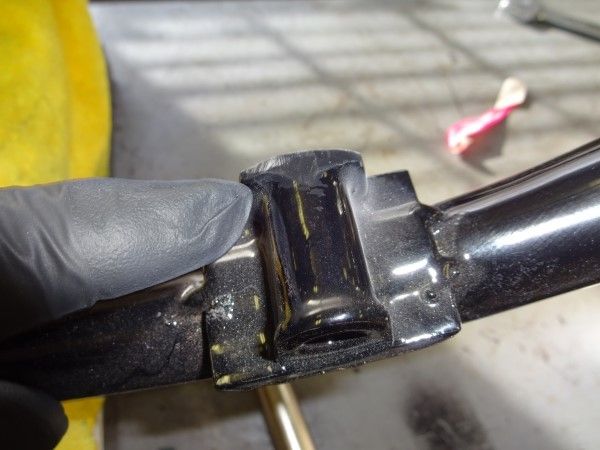
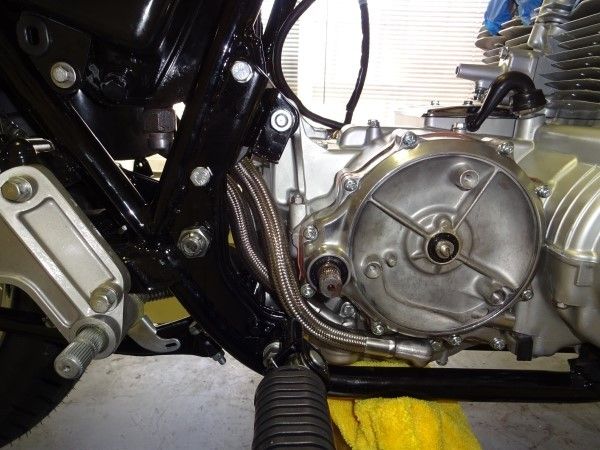
Oh, and these Stainless braided lines are real Peaches to get on too. I thought the ones on The Norton resto were tricky, 2 strokes only have a 1/4" plastic tube with a couple of crappy clamps. Ahhhh, simplicity.


Image

Goal is to check out the oil system and see if it is working properly, I don't want to hook up carbs and exhaust until I know the oil system is solid.


Top
 Profile  
 
PostPosted: Tue Feb 09, 2016 1:02 pm 

Joined: Wed Jun 22, 2011 11:43 am
Posts: 311
Location: CT and Sometimes SC
Glad that I took the time to test the oil system. I could not get any oil pressure using the starter motor with the plugs removed. The scavenge pump was moving oil back to the tank but there was no oil making it's way the main galley behind the cylinders where the pressure switch and a gauge I installed reside. The oil pan got dropped and the pump pulled. I put it back into a tank of oil and realized my mistake. I was watching the scavenge section while priming the pump and not the pressure side. I still had a hard time priming the pressure side until I held back the check valve and a big "Blurp" came out. The pump started moving oil and was now primed. Maybe it would have self primed but I wasn't taking any chances.

Scavenge from the pan back to the tank. This is where I thought I was priming the pump when I saw the oil moving through the first time.

Image


If I could read properly and understand simple pictures from a book, I would have realized this is where I wanted to see oil coming from when priming. Holding open the check valve with my finger helped get the air bubble out.

Image

And this was the result after about a minute of cranking. I observed oil moving around on both sides of the top end so that was good news too.


Image


The exhaust got put on too. This is part of the restoration that will not be stock. For one thing NOS Exhausts are made of Unobtainium. The Kerker Exhaust, along with the low bars were common mods to bikes back in the late 70's and early 80's. Just about all the guys I hung out with back then had those mods on their bikes so I figure the look will be close to period correct. It is starting to look more and more like a motorcycle now. My hope is to have it running with all lights working off a bottle by March. This weekend is The Snow Run Enduro, our Dirt Bike Club's Annual Event, so that will take a little of my weekend time. The wives are very happy it is on Valentine's Day this year. A couple of pics of the exhaust installed,


Image

I don't like the way the exhaust is anchored in the back to the rear shock mount. It kind of reminds me of an early 70's era motocrosser the way they would anchor the stinger of an expansion chamber. The idea now is to check out fabricating a bracket to the rear peg mount and eliminating that bracket.

Image


Top
 Profile  
 
PostPosted: Tue Feb 09, 2016 1:48 pm 
User avatar

Joined: Tue Jun 21, 2011 10:09 am
Posts: 579
That hanger, while not pretty, is absolutely period-correct. I don't blame you for improving it's appearance, though. You're doing a fantastic job.


Lane


Top
 Profile  
 
Display posts from previous:  Sort by  
Post new topic Reply to topic  [ 101 posts ]  Go to page Previous  1 ... 3, 4, 5, 6, 7, 8, 9 ... 11  Next

All times are UTC - 5 hours


Who is online

Users browsing this forum: No registered users


You cannot post new topics in this forum
You cannot reply to topics in this forum
You cannot edit your posts in this forum
You cannot delete your posts in this forum
You cannot post attachments in this forum

Jump to:  
Powered by phpBB® Forum Software © phpBB Group